Last year, for my wedding, we bought these plastic snowflake ornaments to decorate the christmas tress already up at the church:
 |
| Chad watching his bride walk down the aisle... and one of my nephews. |
 |
| The snowflakes and the white lights we put on the trees really added some light and color. | | |
|
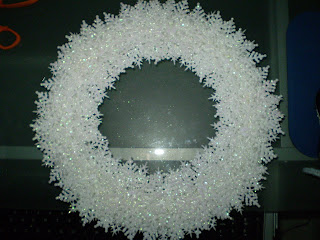
After the wedding, we split up the ornaments to whoever wanted them. I ended up with 2 boxes. I knew I probably wouldn't put them on my tree, but knew I wanted to do something with them... Here is what I came up with:
 |
| You need a white, flat foam wreath. Some plastic snowflakes (you can get them at the dollar store or craft stores). And a hot glue gun. |
 |
| Just start gluing the snowflakes around the wreath |
 |
| After you go all the way around once, start a second row that is off center from the first row. |
 |
| Keep going around till you either run out of snowflakes or like how it looks. |
 |
| One side complete! You can either stop here (skip the next step) or flip it over and add more. I had two different snowflake designs and didn't want to mix them, so I did one design on one side and one on the other... One of them is more shiny than the other and depending on where I display the wreath, I can choose the side that looks better. |
 |
| Side 2 complete. |
 |
| Tie a ribbon around it. I cut a slit in the top of the ribbon so it would lay flat. |
This is the first time I have made a wreath. I have another wreath project to do, but I am having trouble finding one of the parts of it, so stay tuned for that.


3 comments:
Congrats on your first wreath! Looks great!
makingitfeellikehome.blogspot.com
Thank you!
Love how pretty and full it is!
Post a Comment